Rocket Chat – Self Hosted – Proxmox
A quick reference guide on how to configure a self-hosted Proxmox container, with nested docker to run Rocketchat. It should be noted that this is a vanilla install, and I will be looking to create walk through guides in the future on how to add LDAP authentication. I use Starlink internet, so I have a dynamic IP address, I have used Zoneedit and linked this to my Unifi USG firewall to ensure connectivity during this demonstration, however I was not successful. For those not having the constraints of CGNAT, I will keep the reference material in here.
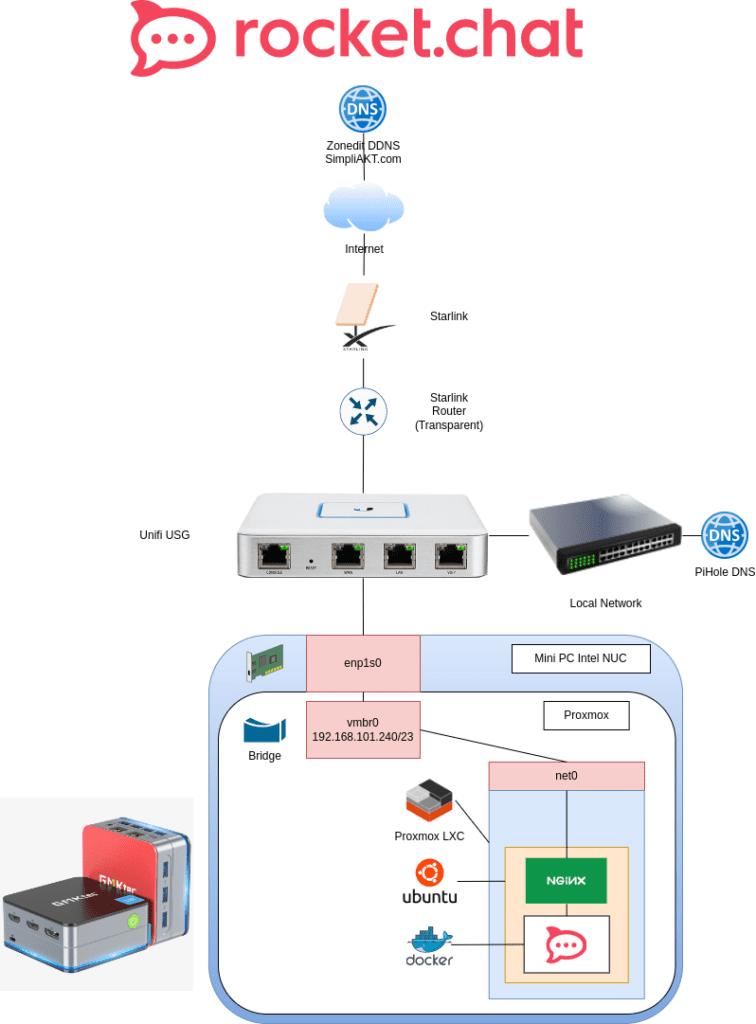
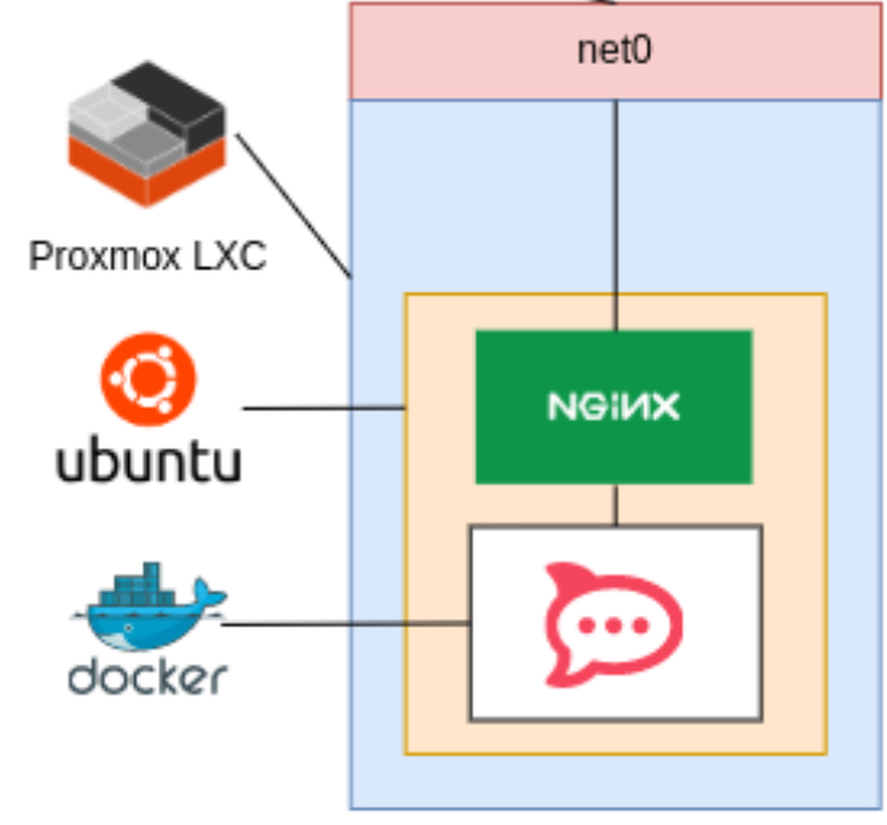
For Reference, here is my topology:
Prerequisites:
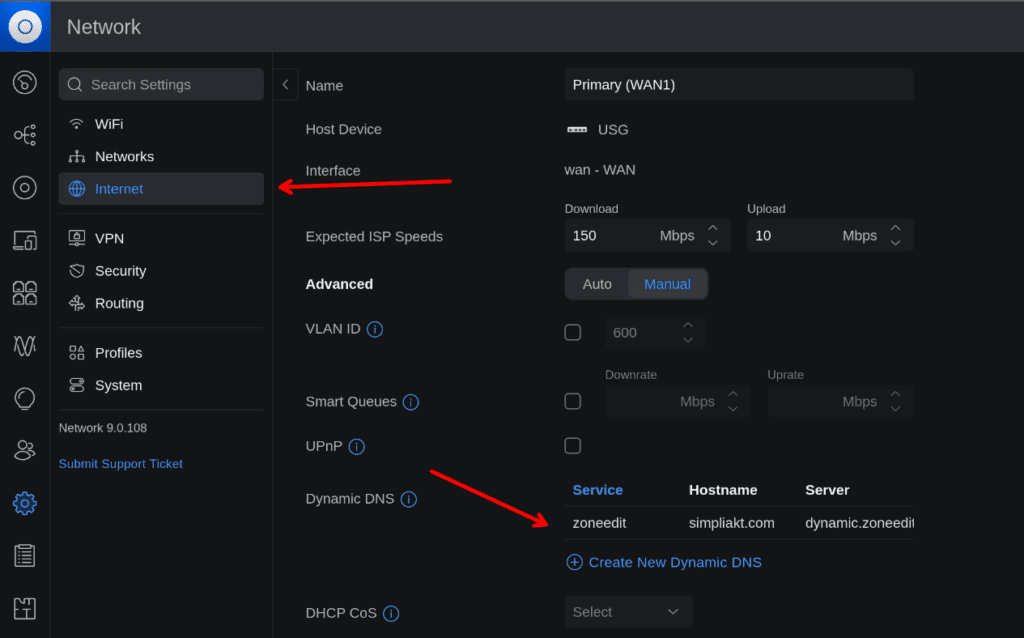
For those of you not on Starlink or similar, I will not detail how to set up Dynamic DNS in this walk through, but in brief, you can point you domain name’s NS records to zoneedit. on my USG firewall, I have configured zonedit as my DDNS provider
Here is where I did that:
I have also created a route to allow port 443 inwards to the IP address of my RocketChat server.
Because I have dynamic DNS, I am not able to use LetsEncrypt (at least very easily), so I will use my own certificate
without the API renewal automation.
Lets begin!
Log in to your Proxmox server:
Expand the host that you are on
Click Local (or wherever you have your container storage)
Click CT Templates
Download the latest version of ubuntu, for me at this time it was 24.10 Oracular
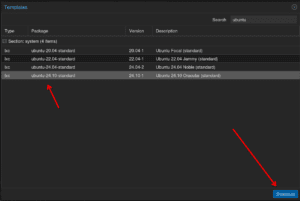
Wait for the download to complete, you should get TASK OK at the end if this was successful
Click the Create CT button on the top right of the main Proxmox window
Name the container whatever you like, in my case “RocketChat”
Add a password
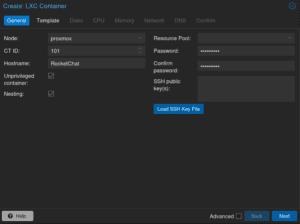
Click Next
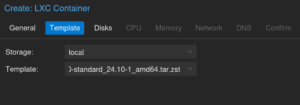
Select the Ubuntu container template that you just downloaded
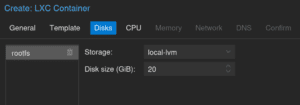
Select your local storage and give some space, in my case 20Gb
Add a CPU
Add some RAM, in my case I added 2Gb (2048 MiB)
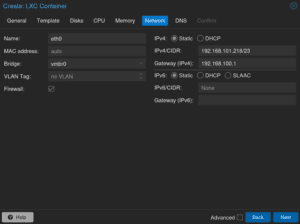
Choose your network
Chose whether you want to run the host based firewall on the container
Give the container an IP address and default gateway so it can reach the local network, and the internet for registration
Complete the pre-staging, and “power on” the container
Initial Configuration:
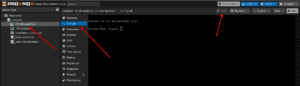
You will then open the console of the container inside Proxmox
Your default username will be root (and the password you set on creation of the container)- I do not recommend using this user account to perform the installation, in the example below I will create a new user
First thing to do will be update the OS in the container
sudo apt updatesudo apt upgrade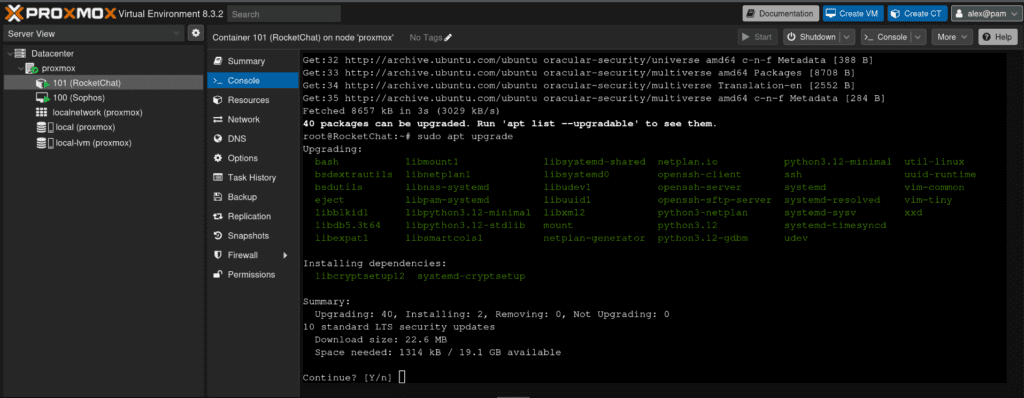
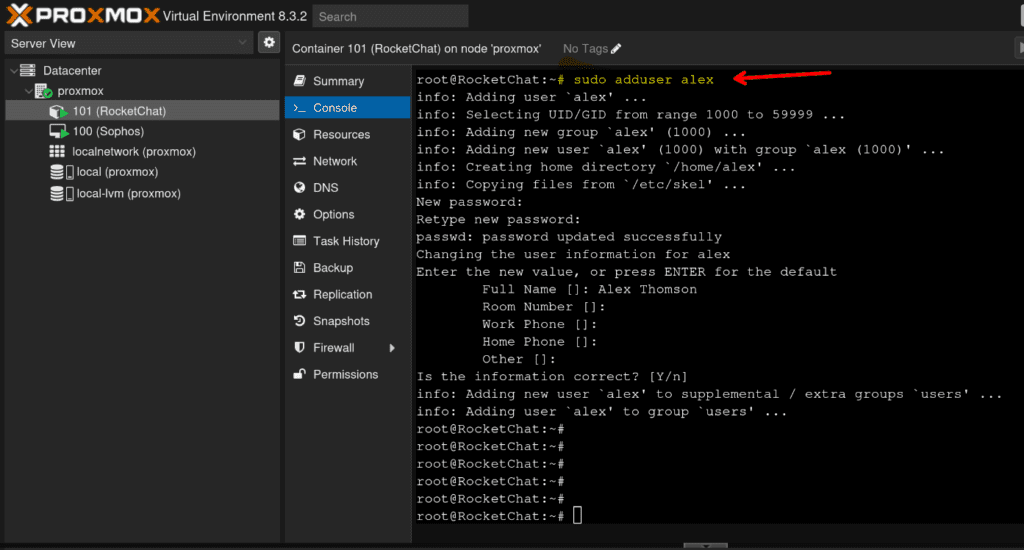
Add a user to your system, in my case “alex”
sudo adduser <your username>Complete the wizard for creating the user, and select a password
Add the user to the sudoers file
sudo visudoadd your user to the sudoers file
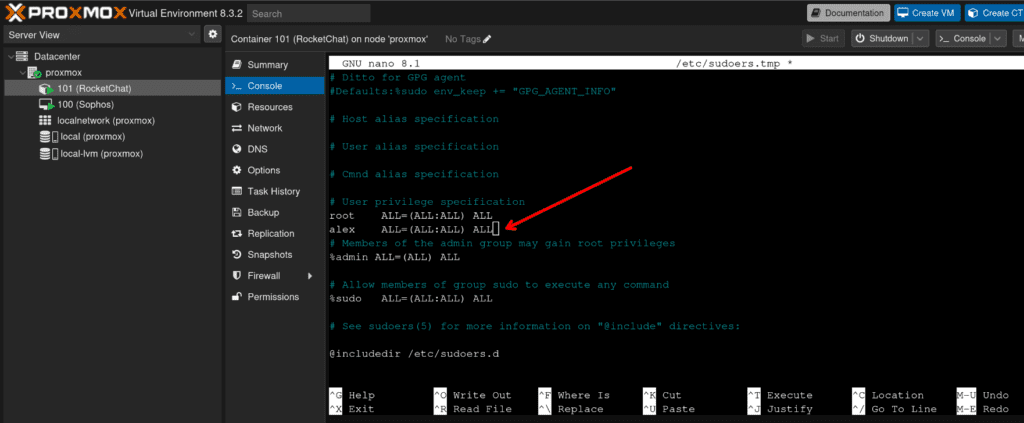
save and exit (for nano, this is CTRL + O, ENTER then CTRL + X)
check SSH is running
systemctl status ssh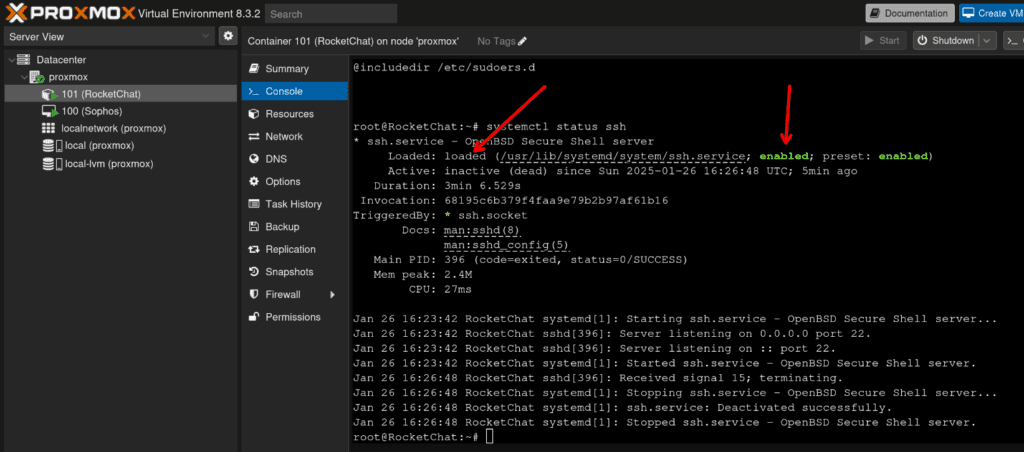
Log out of the console session as this will be easier while using SSH
logoutNow instead of working through Proxmox web console to the VM, Open up your favourite terminal / SSH client and connect to your container with the IP address that you gave it, and the username you created. in my case alex@192.168.101.218
This allows us to copy and paste commands easily instead of typing them out, Depending on the browser you are using, copy and paste may work to the web console also, so this up to you.
ssh <your username>@<your IP address>Authenticate with your password
Now we install the prerequisites
sudo apt install curlGet the docker installer (yes I know, Docker inside LXC is kind of meta, but there is no Rocketchat LXC available for Proxmox (yet..?)

If we think of the hierachy of containerisation here:
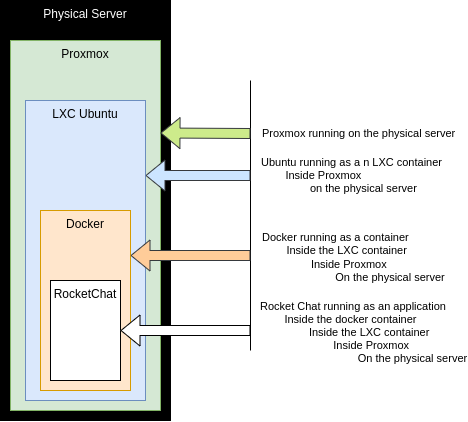
With that out of the way, lets…
Carry on the installation:
curl -L https://get.docker.com | sh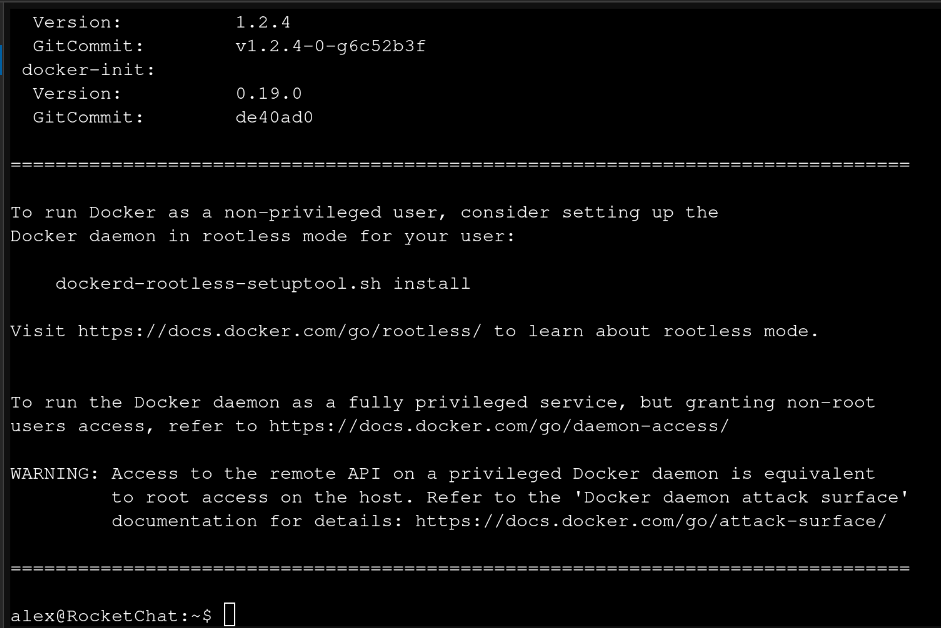
Add your (logged in) user to the docker group
sudo usermod -aG docker $USERCourtesy reboot!
sudo rebootThe container should come back quickly
SSH back in to your container or continue on the web console, don’t do what I did and continue the installation on your own machine, then get confused why things were not working!
ssh <your user>@<your ip address>Now is the time to download the RocketChat docker image
curl -L https://raw.githubusercontent.com/RocketChat/Docker.Official.Image/master/compose.yml -OWe need to edit the environment here, this will very much depend on how you want to do this. I will demonstrate setting this up on a local DNS name, you will need to create a locally (and publicly if you are going to internet face this) resolvable DNS A record in your DNS infrastructure, and your hosted DNS instance for this to work.
I use PiHole, so to demonstrate the DNS record addition here, I added a simple A record:
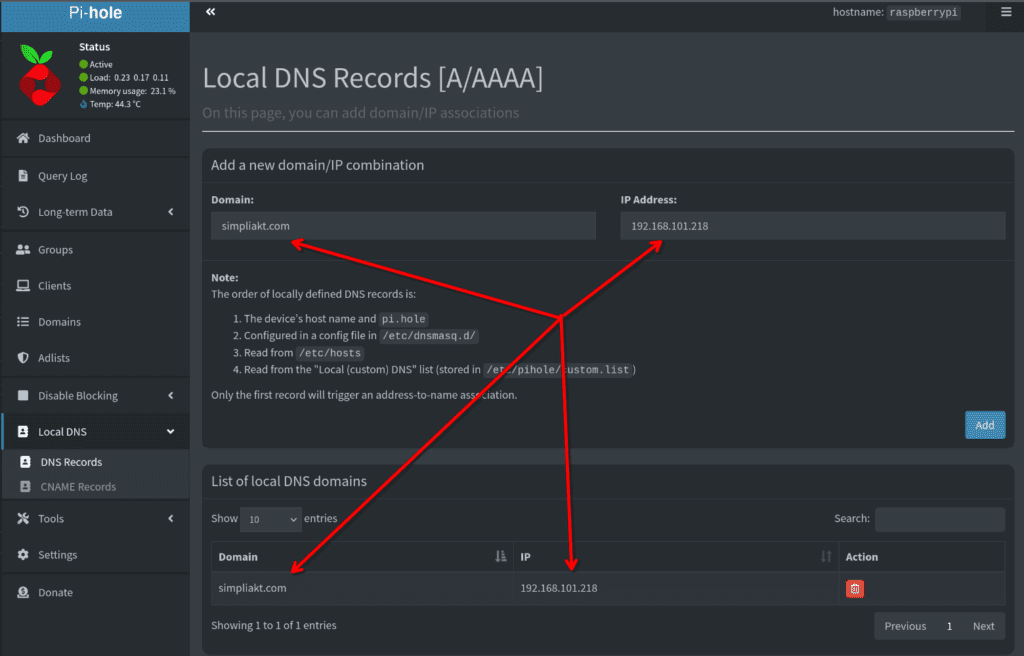
Lets get the environment variables set to reflect this, on the listen port of your choice
nano .envAdd the contents to the file, you will need at minimum the following:
- RELEASE
Here is an example:
I will set up https on port 443 within Nginx later, as I will be installing a certificate here, using Nginx as a reverse proxy.
RELEASE=latestSave and exit the file (for nano, this is CTRL + O, ENTER then CTRL + X)
The releases page of rocket chat shows all of the stable / development images available. They do not recommend pinning to the latest bleeding edge release, but this is fine for a lab and test of features for my use case
Next we will add a certificate to the local instance
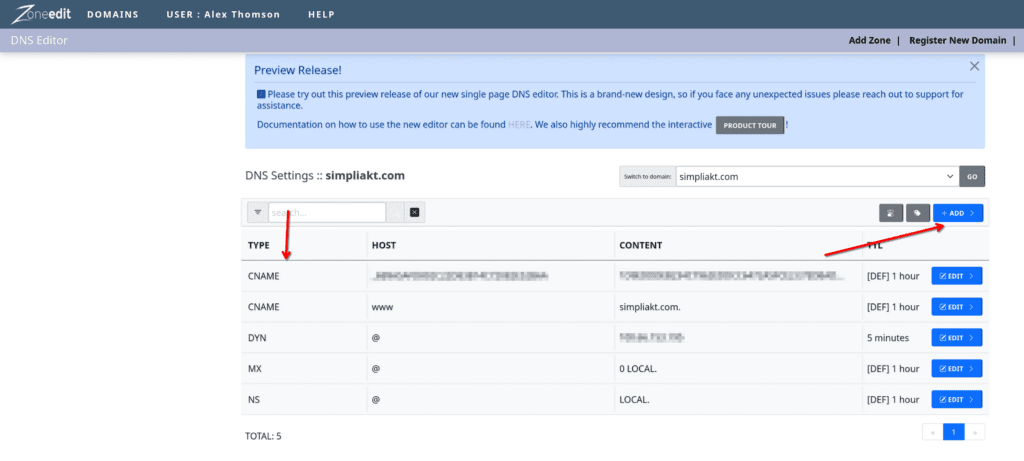
For this i had ZeroSSL generate my private key so no CSR (certificate signing request) required
Once the certificate is minted / signed you will need to upload the certificate to your server.
As stated, I used ZeroSSL here to get a free 90 day certificate for demonstration and lab purposes, for this I created a DNS CNAME within Zoneedit
Once I downloaded the certificates from the certificate authority, I unzipped, placed on my local machine, and used SCP to push them to my RocketChat server:
scp * <remote user name>@<rocketchat server ip>:/home/<place you want your certificates>/ 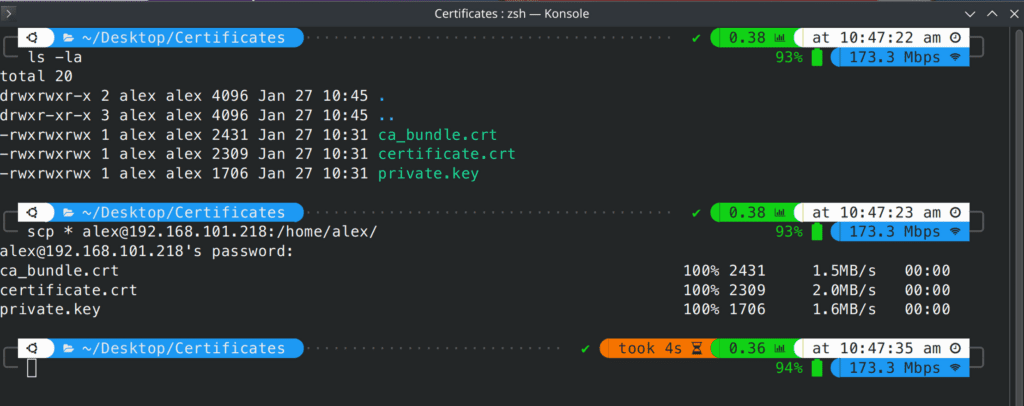
then you can validate that they arrived on the server:
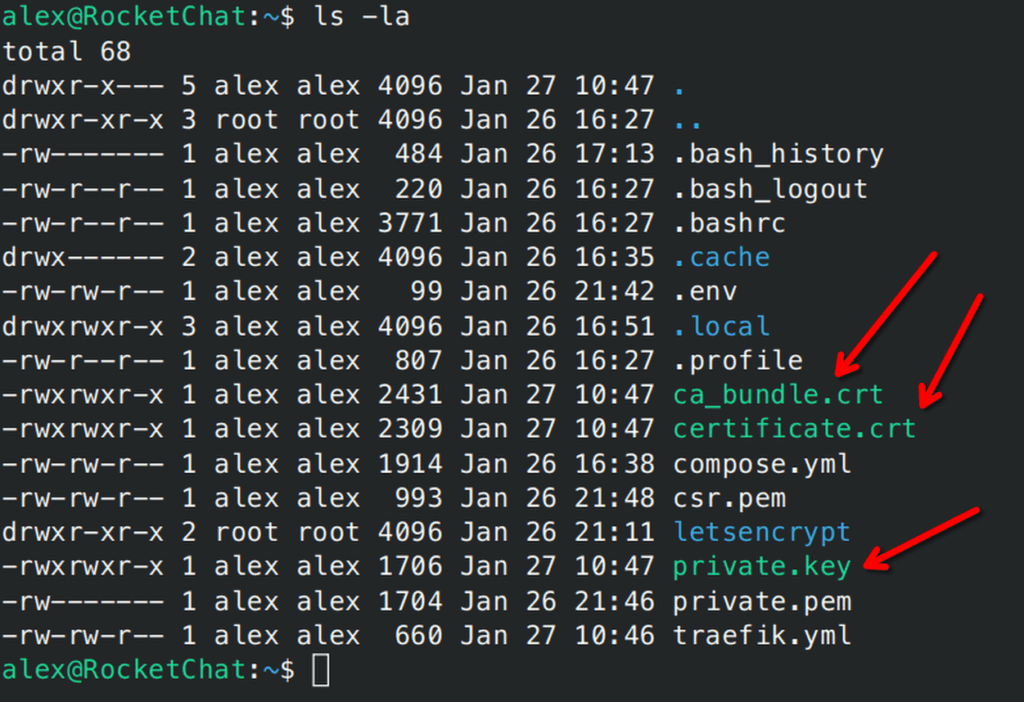
We will use the Nginx config to pull these certs when required.
I put my certificates in /home/alex/certs
I switched to vim at this point as I am more familiar with it, if you are not familiar, stick with nano, for these reasons!!:

here is how to install vim if you want to
sudo apt install vimthere are some really nice walkthroughs on RocketChat’s documentation that explain how to configure this, which I followed, opting for Nginx on the container, rather than setting up Traefik inside a container, and mapping the network between the containers
make a folder for your certs:
mkdir certsCopy the certs to the folder you just created
cp <name of certs> /home/<username>/certsLets install Nginx
sudo apt-get install nginxAs per the RocketChat documentation, we will take a backup of the original config
cd /etc/nginx/sites-available
 sudo mv default default.reference
and then we edit the config
I will advise pulling the template from RobotChat website and editing, here is mine and the bits I edited:
Lets open the file
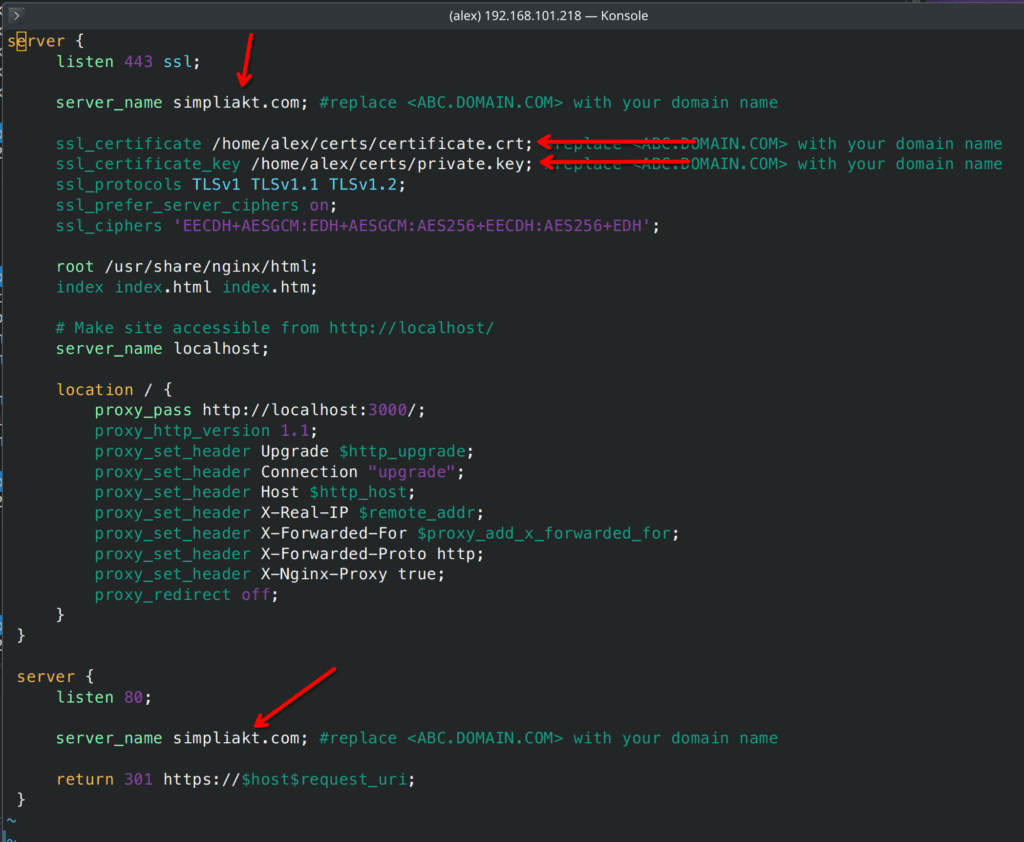
sudo nano /etc/nginx/sites-available/defaultHere is the template from the RocketChat site
server {
     listen 443 ssl;

     server_name <ABC.DOMAIN.COM>; #replace <ABC.DOMAIN.COM> with your domain name

     ssl_certificate /etc/letsencrypt/live/<ABC.DOMAIN.COM>/fullchain.pem; #replace <ABC.DOMAIN.COM> with your domain name
     ssl_certificate_key /etc/letsencrypt/live/<ABC.DOMAIN.COM>/privkey.pem; #replace <ABC.DOMAIN.COM> with your domain name
     ssl_protocols TLSv1 TLSv1.1 TLSv1.2;
     ssl_prefer_server_ciphers on;
     ssl_ciphers 'EECDH+AESGCM:EDH+AESGCM:AES256+EECDH:AES256+EDH';

     root /usr/share/nginx/html;
     index index.html index.htm;

     # Make site accessible from http://localhost/
     server_name localhost;

     location / {
         proxy_pass http://localhost:3000/;
         proxy_http_version 1.1;
         proxy_set_header Upgrade $http_upgrade;
         proxy_set_header Connection "upgrade";
         proxy_set_header Host $http_host;
         proxy_set_header X-Real-IP $remote_addr;
         proxy_set_header X-Forwarded-For $proxy_add_x_forwarded_for;
         proxy_set_header X-Forwarded-Proto http;
         proxy_set_header X-Nginx-Proxy true;
         proxy_redirect off;
     }
 }

 server {
     listen 80;

     server_name <ABC.DOMAIN.COM>; #replace <ABC.DOMAIN.COM> with your domain name

     return 301 https://$host$request_uri;
 }
Test that there are no syntax errors in the config once you have finished:
sudo nginx -t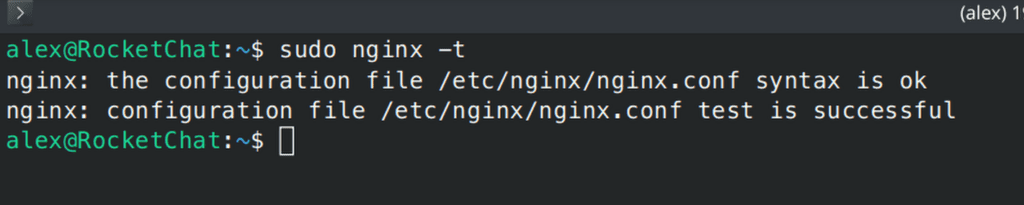
if all is well, you will get an OK and a Success message like this one
we can restart Nginx now and bring up the application
sudo systemctl restart nginx
docker compose stop rocketchat
docker compose rm rocketchat
docker compose up -d rocketchat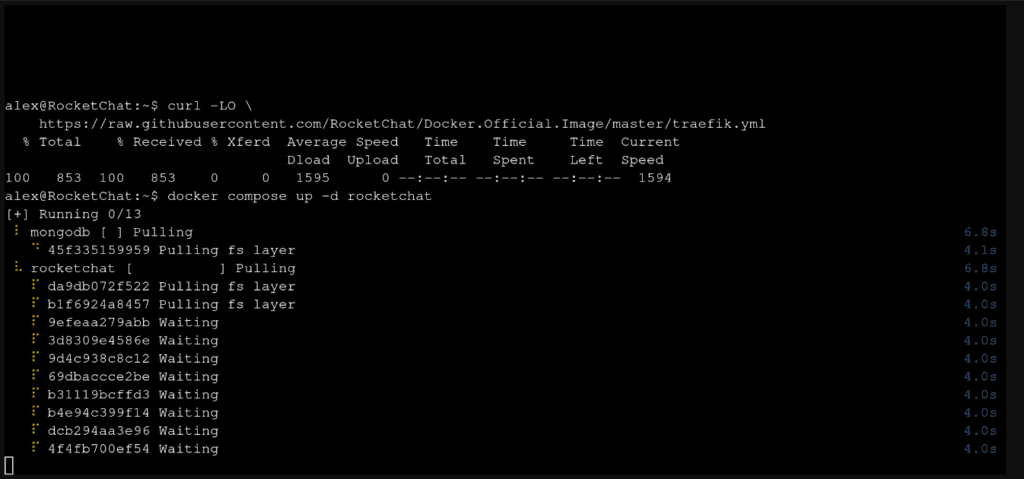
Following the install, you can tail the live log to see the progress of bringing up the service
docker compose logs -f rocketchat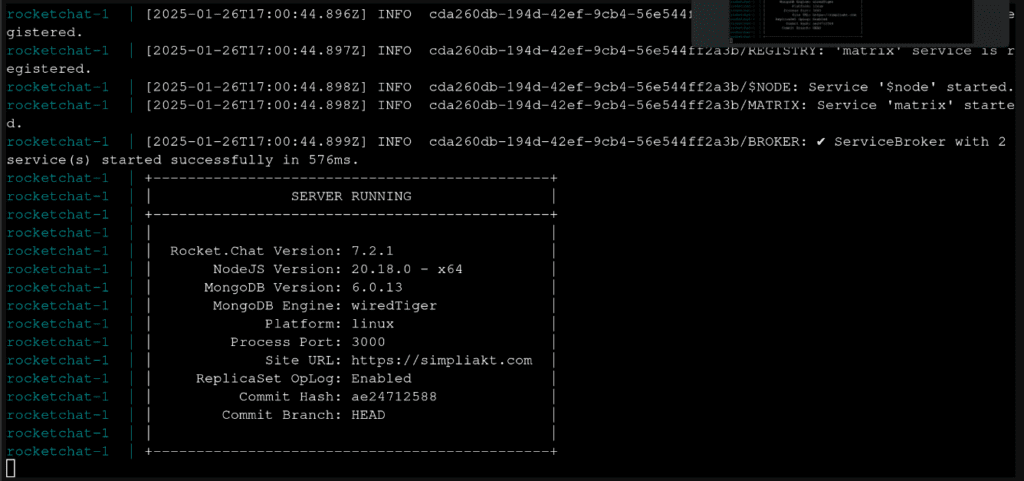
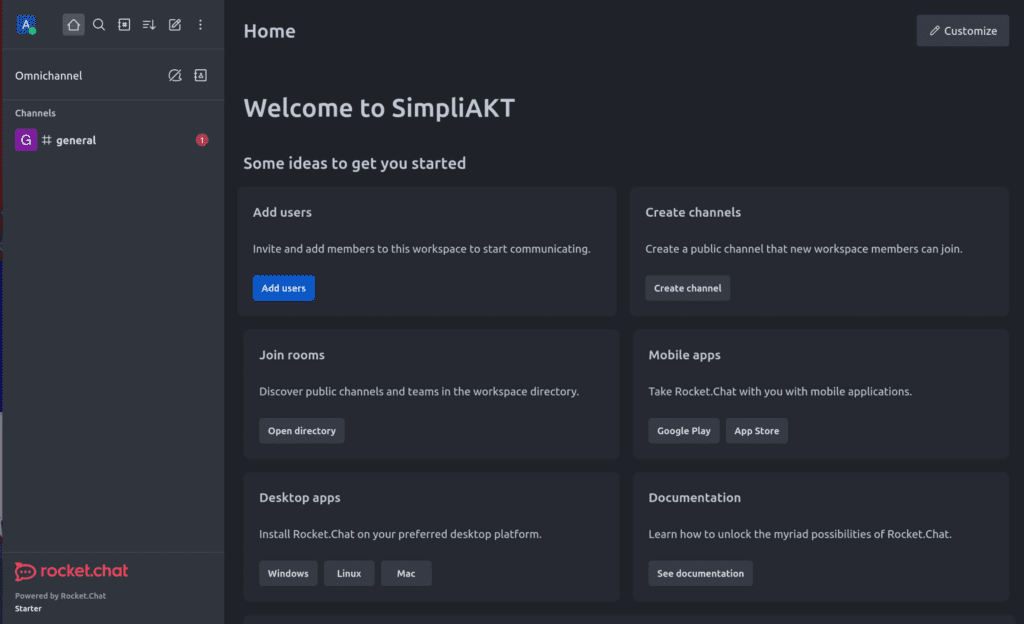
This is the base install done!
Lets browse to the site and see if the certificate is the one we are expecting
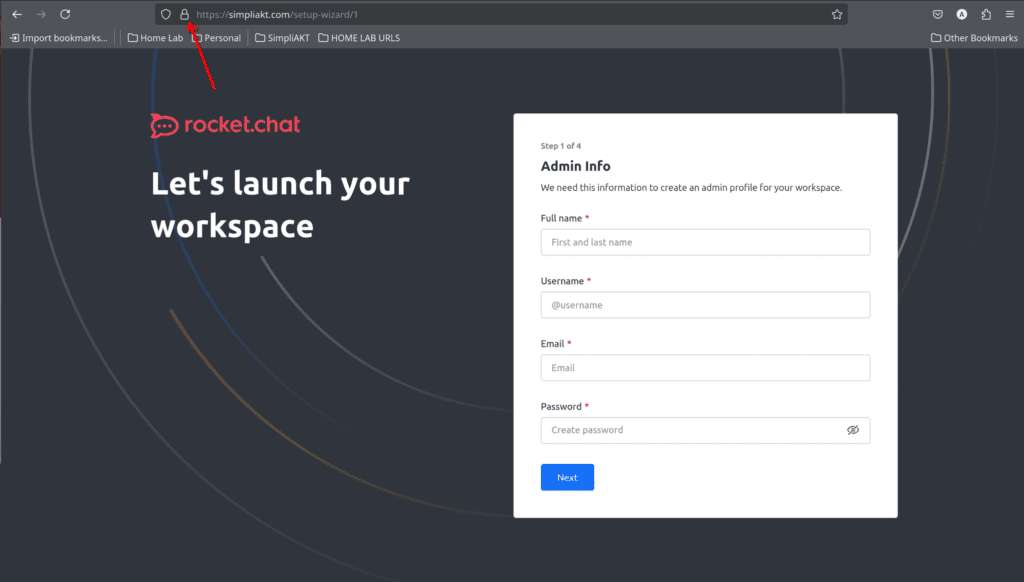
For this I am using Firefox, and clicking on the padlock, then on the “connection secure” icon
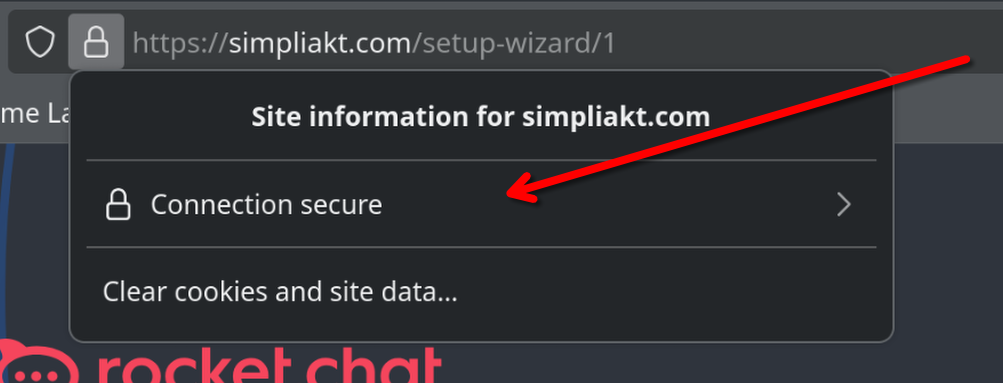
More Information
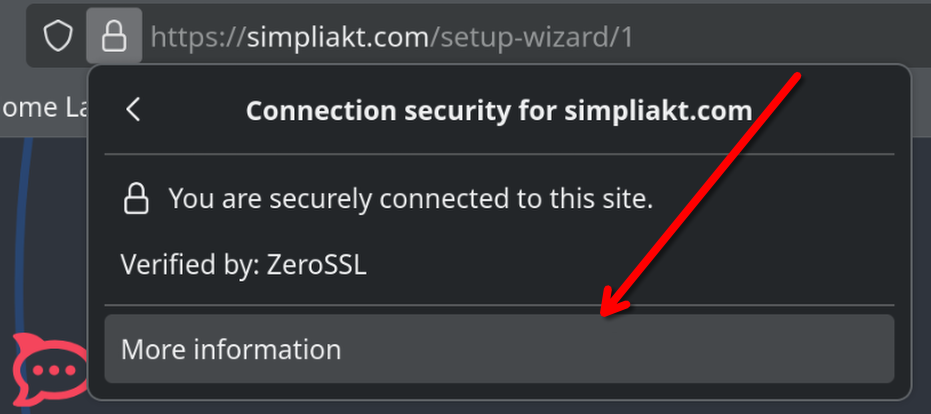
Click on View Certificate (if you are eagle eye’d you will see how many attempts it took me to get to this stage)
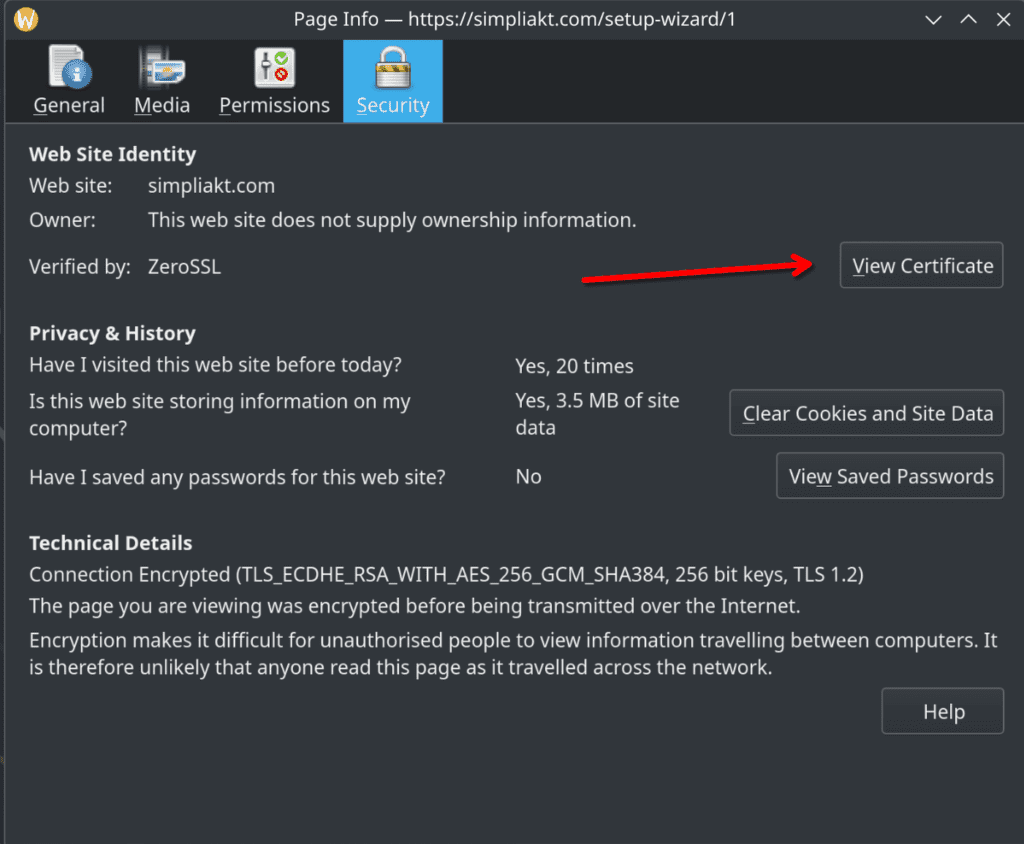
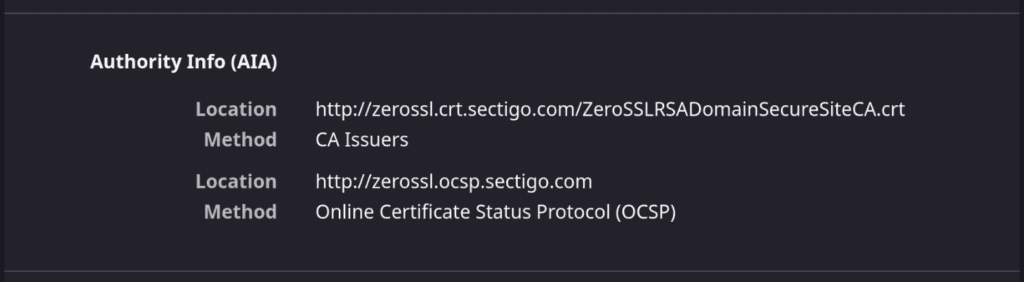
You can then have a look to see if the certificate was installed and issued correctly, in my case by ZeroSSL
When I filled in my information in the wizard, I got the following, after a doorbell sound
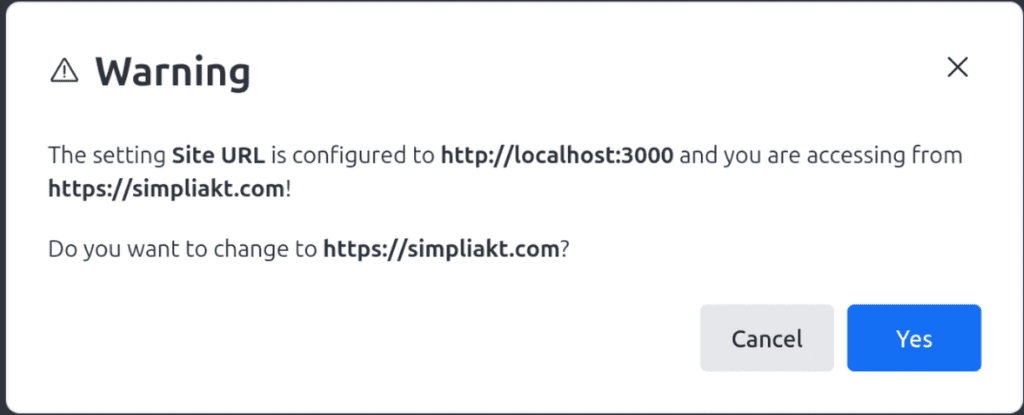
I pressed cancel and continued with the wizard.
When finished, you should receive an email to validate your implementation with an activation link. I needed to restart the LXC to get this
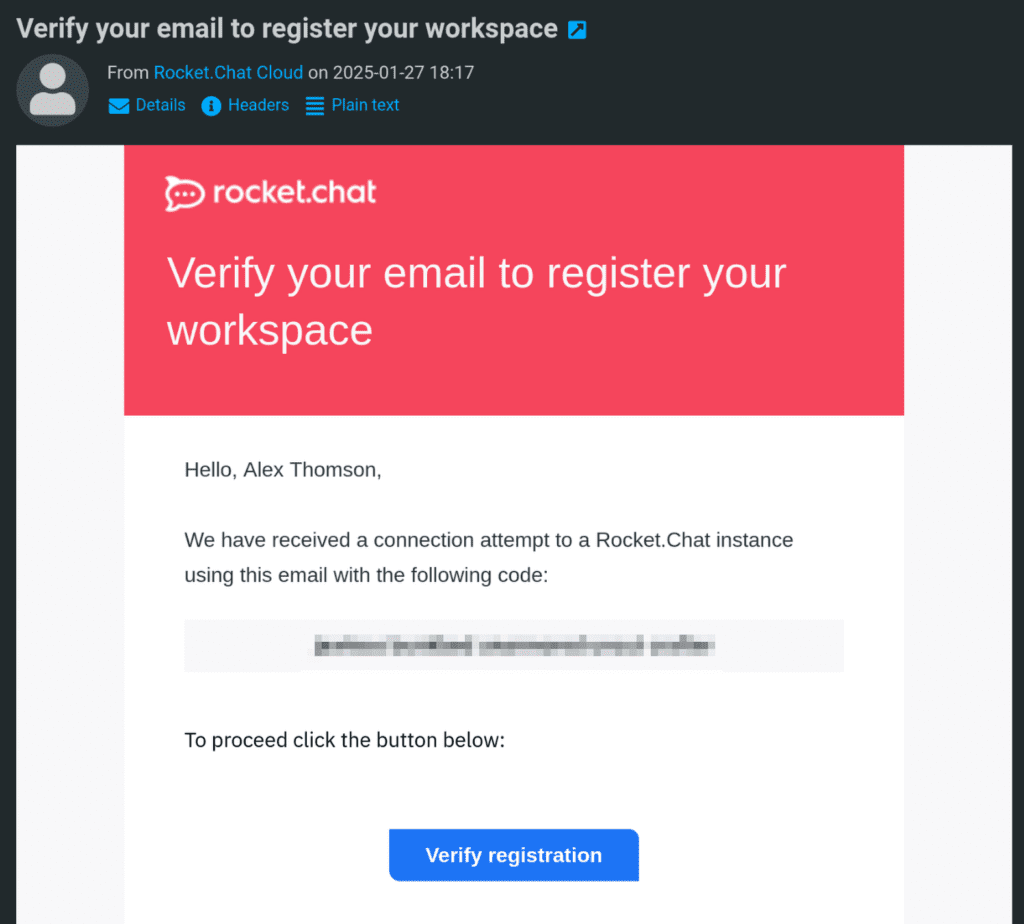
As soon as I clicked Verify, I got the doorbell sound again, and was in!
At this point I exited the SSH session and installed rocketchat on my Ubuntu laptop
sudo snap install rocketchat-desktopFootnote and lessons learned:
- When I started with this implementation, I had envisaged that LetsEncrypt and the akami bot would manage my certificate here nicely.
- There are many reasons why it didn’t, first being due to me having created a local DNS A record for this domain name
- Letsencrypt does not play nice with dynamic DNS.
- If you are trying to use Traefik, and are deviating from the standard documented pattern on RocketChat website, you will need to know how docker –> docker and docker –> host networking works, and how to map volumes between host and containers, I started fresh after about an hour of fiddling round trying to get this working, in favor of a slightly easier implementation of Nginx on the Ubuntu LXC.
- You will also have issues getting a certificate created if your firewall is not allowing the traffic inbound. The service needs to be contactable from the outside world, there is host based checking that is done.
- After doing much research, Due to CGNAT implementation with Starlink, I can’t use DDNS solutions. This is because of the reasons detailed here: https://www.starlink.com/gb/support/article/1192f3ef-2a17-31d9-261a-a59d215629f4. There may be ways around this by creating a site to cloud VPN with something like Tailscale
- I have been quoted a rather large sum of money for a specialist company to add a 5G and some DC hosted aggregation, and then a price per GB for 5G data used
- I think I would be better getting a basic business ADSL connection for my inbound traffic, set this up as a secondary internet on my USG and suffer with the blisteringly fast 512k upload, 10Mb download speeds that this offers, then figuring out how to do my own smart aggregation
- I have not looked into any of this yet. For now I am happy with internal only connectivity in my lab environment.
No responses yet